Preparing a motorhome for a road trip usually involves checking tire pressure, testing the brakes, inspecting fluid levels, and making sure everything inside the RV is securely stored.
Yet one important safety component is frequently overlooked: the windshield.
A motorhome’s windshield does much more than provide a view of the road. It protects occupants from wind and debris, contributes to the vehicle’s overall safety, and helps drivers navigate unfamiliar roads and changing weather conditions.
Because motorhomes often have larger windshields than passenger cars, even relatively minor damage can become a significant concern during a long journey.
Before your next trip, take a few minutes to inspect the following areas.
1. Look for Chips and Cracks Before They Become Bigger Problems
Start with a thorough visual inspection of the windshield.
Look at the glass from both inside and outside the motorhome, paying particular attention to areas around the edges and the driver’s field of vision.
Small chips can be surprisingly difficult to notice, especially when the windshield is dirty or reflecting bright sunlight.
Although some minor damage can be repaired, other types of cracks may require a complete windshield replacement.
The size of the damage isn’t the only factor that matters. Its location, depth, and proximity to the windshield’s edges also influence whether repair is appropriate.
A crack that appears harmless while the motorhome is parked may become more problematic during extended travel as the vehicle experiences vibration, changes in temperature, and movement over uneven road surfaces.
What to do: If you discover damage, arrange a professional assessment before departure. Don’t assume a small chip will remain unchanged throughout a long trip.
2. Check Visibility in Different Lighting Conditions
A windshield can appear perfectly clear while a motorhome is parked in the shade.
However, visibility problems often become more noticeable when driving toward the rising or setting sun, or when headlights shine through the glass at night.
Over time, airborne dust, sand, road debris, and ordinary wear can create tiny pits and scratches across the windshield’s surface.
This accumulated damage can scatter light and produce distracting glare.
For RV owners who spend long hours on highways, windshield clarity is particularly important because fatigue and changing light conditions can already make driving more demanding.
Before leaving, clean the windshield thoroughly and inspect it from the driver’s normal seating position.
If possible, observe how the glass looks in direct sunlight.
Persistent glare, severe pitting, or distorted visibility that remains after cleaning deserves professional attention.
Also inspect the interior surface of the windshield. Film, fingerprints, and residue can create additional glare, particularly during nighttime driving.
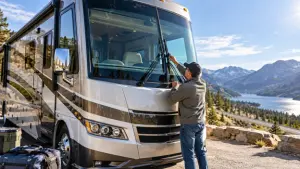
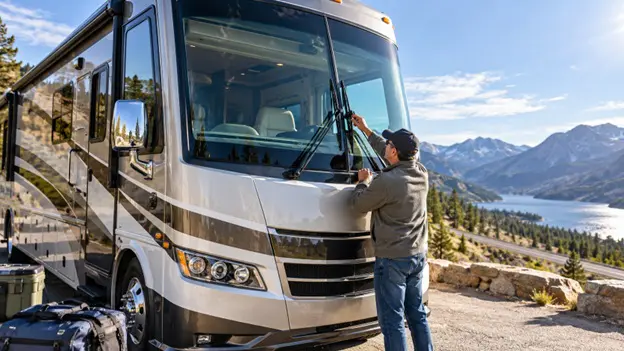
3. Inspect Your Windshield Wipers and Washer System
Motorhome windshield wipers have an important job.
Depending on the vehicle, they may need to clear a much larger area of glass than the wipers on a typical passenger car.
Worn blades can leave streaks, skip across the windshield, or fail to remove water effectively during heavy rain.
Inspect the rubber for cracking, brittleness, missing sections, or obvious wear.
Then test the wipers using washer fluid to make sure they sweep smoothly and clear the intended viewing area.
Pay attention to the washer nozzles as well. A full reservoir isn’t particularly useful if the spray doesn’t reach the windshield.
If the wipers leave persistent streaks after cleaning, replacing them before a long trip is often a worthwhile precaution.
Use replacement blades appropriate for your specific motorhome or chassis, and follow the manufacturer’s recommendations for washer fluid.
Avoid operating dry or damaged wiper blades against the windshield, as this can scratch the glass.
4. Examine the Windshield Seals and Surrounding Trim
Windshield inspections shouldn’t stop at the glass itself.
Depending on the motorhome’s design, the windshield may be installed using adhesive bonding, rubber gaskets, or other manufacturer-specified components.
The surrounding seals, moldings, and frame condition are important to a properly functioning installation.
Inspect the area around the windshield for visible damage, displaced trim, gaps, or signs of water intrusion.
Inside the motorhome, look for unusual moisture or staining around the windshield and nearby interior panels.
Water entering around the front of an RV doesn’t always indicate a failed windshield seal; roof joints, clearance lights, and other nearby components may also be responsible.
A qualified technician can help determine the source.
Avoid pulling on windshield trim or attempting to reseal the glass with household adhesives. Improper repairs can make the underlying problem harder to diagnose and may interfere with a future glass replacement.
5. Consider the Road Conditions Along Your Route
Not all road trips expose a motorhome to the same risks.
A route involving major highways, construction zones, mountain roads, or loose gravel may expose the windshield to more flying debris than a short drive on well-maintained roads.
Road construction and vehicles carrying loose materials are particularly worth watching.
While it’s impossible to eliminate every risk, a few sensible driving habits can help reduce exposure.
Maintain a safe following distance, especially behind large trucks and construction vehicles. Increase your distance when loose debris is visible, and avoid unnecessary travel through areas where rocks or gravel are being disturbed.
Be especially careful when following vehicles on freshly resurfaced roads.
A safe following distance is primarily a driving-safety measure, but it can also reduce your exposure to debris thrown directly from the vehicle ahead.
Never make sudden or unsafe maneuvers simply to avoid a potential rock strike.
6. Know What to Do if Your Windshield Gets Damaged During the Trip
Even with careful preparation, windshield damage can still happen.
Imagine driving through an unfamiliar state when a rock strikes the front glass and leaves a visible chip.
The first priority is maintaining control of the vehicle.
If the impact significantly affects visibility, pull over somewhere safe as soon as conditions permit.
Once parked, inspect the damage without touching sharp or broken glass.
Take clear photographs showing both the close-up damage and its location on the windshield. These may be useful when speaking with a repair specialist or insurance provider.
Don’t attempt to judge windshield safety based solely on whether the crack looks small.
Damage in the driver’s viewing area, extensive cracking, or glass that appears unstable should receive prompt professional attention before further driving.
If you’re uncertain whether the motorhome is safe to operate, contact a qualified glass professional or roadside assistance provider.
7. Have Your Motorhome Information Ready Before Requesting Glass Service
One of the challenges of RV windshield replacement is identifying the correct glass.
Unlike most passenger cars, motorhomes can have different windshield shapes and configurations depending on the coach manufacturer, model, production year, and chassis.
Some Class A motorhomes use large one-piece windshields, while others have split configurations. Class B and Class C models may use glass associated with their underlying vehicle platforms.
When contacting an RV glass specialist, having accurate vehicle information can help simplify the process.
Useful details include the motorhome manufacturer, model, model year, VIN, and any available coach serial number.
Photographs of the front of the vehicle and the damaged windshield can also help.
For owners who need professional assistance, RV Glass Guru provides RV windshield replacement services and quotes for different motorhome types.
Identifying the correct glass and confirming service availability before arranging travel can help prevent unnecessary delays.
8. Don’t Forget About Insurance and Scheduling
An unexpected windshield replacement can disrupt a road trip, particularly when the required glass isn’t immediately available.
Before traveling, review your motorhome insurance policy to understand what it covers.
Some comprehensive policies include glass damage, but deductibles, exclusions, and state-specific provisions can affect what you ultimately pay.
It’s also useful to understand whether the policy allows you to choose a repair provider and how claims should be submitted.
If your windshield requires replacement before a scheduled departure, plan for more than the installation appointment itself.
Certain windshield installations use adhesives that require a specified minimum safe drive-away time. This depends on the adhesive system, environmental conditions, and installation requirements.
Follow the technician’s instructions rather than assuming the motorhome can be driven immediately afterward.
A little scheduling flexibility can make an unexpected repair much easier to manage.
A Simple Pre-Trip Windshield Checklist
Before starting a long motorhome journey, run through these final checks:
- Glass condition: No unassessed chips, cracks, or damage obstructing visibility.
- Visibility: Windshield clean inside and out, without significant glare or distortion.
- Wipers: Blades in good condition and operating smoothly.
- Washer system: Reservoir filled and spray nozzles functioning.
- Seals and trim: No obvious gaps, displaced components, or unexplained moisture.
- Vehicle information: VIN, model details, and relevant ownership documents accessible.
- Insurance: Glass coverage and claims procedures understood.
If you discover an issue, address it before your departure whenever possible.
Final Thoughts
Your motorhome’s windshield is one of the most important components for maintaining a clear view of the road.
A cracked windshield, worn wiper blade, damaged seal, or severe glare problem can turn an otherwise enjoyable trip into an unnecessary complication.
Fortunately, many windshield-related issues can be identified through a simple inspection before leaving home.
Taking a few minutes to check the glass, understand your insurance coverage, and address damage early is a practical addition to any RV maintenance routine.
Whether you’re heading out for a weekend getaway or crossing several states, a clear, properly maintained windshield helps you concentrate on what matters most: driving safely and enjoying the journey.